
Hey guys,
I'm really sorry I haven't posted in a while. I have exams and unfortunately don't finish till the end of June. However I will try to blog as much as I can :) This nail design is what I wore on my birthday and I received a lot of compliments so I thought I should create a tutorial.

These are the nail polishes I used:
Rimmel London - Your Majesty
Essie - Mint Candy Apple
Rimmel London - Disco Ball (optional)
Revlon - White on White
Revlon Quick Dry Top Coat

1) To start off, apply a base coat to all your nails to protect your nails and then apply two coats (or more - you need it to be opaque) of a mint nail polish.
 2) For the next step, you have to find a sponge material. Those make up applicators that you get from eyeshadows are perfect. Take your silver nail polish apply on the sponge material.
3)Take the sponge applicator and dab on the tip of all your nails except the ring fingers. Make sure to dab more right at the tip of your nails - you want a
gradient look.
 You want to end up with something similar to this:
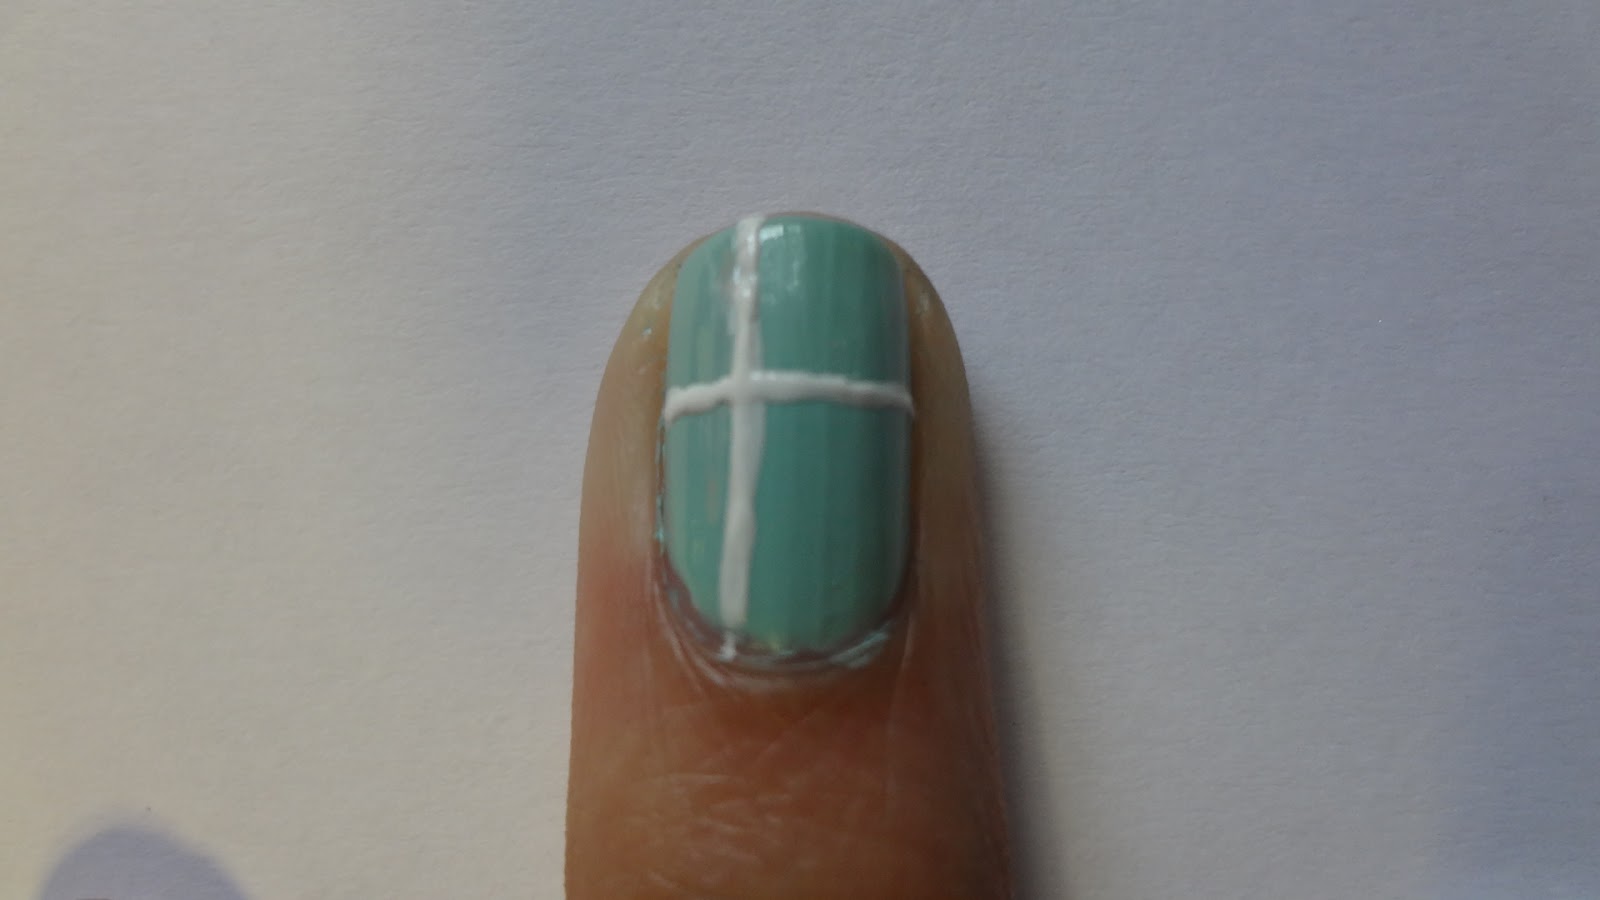
4) On your ring fingers you are going to create a bow. To do this, start off by making straight lines that are perpendicular to each other. I wanted the bow to be more to one side but it looks just as good having the bow in the middle.
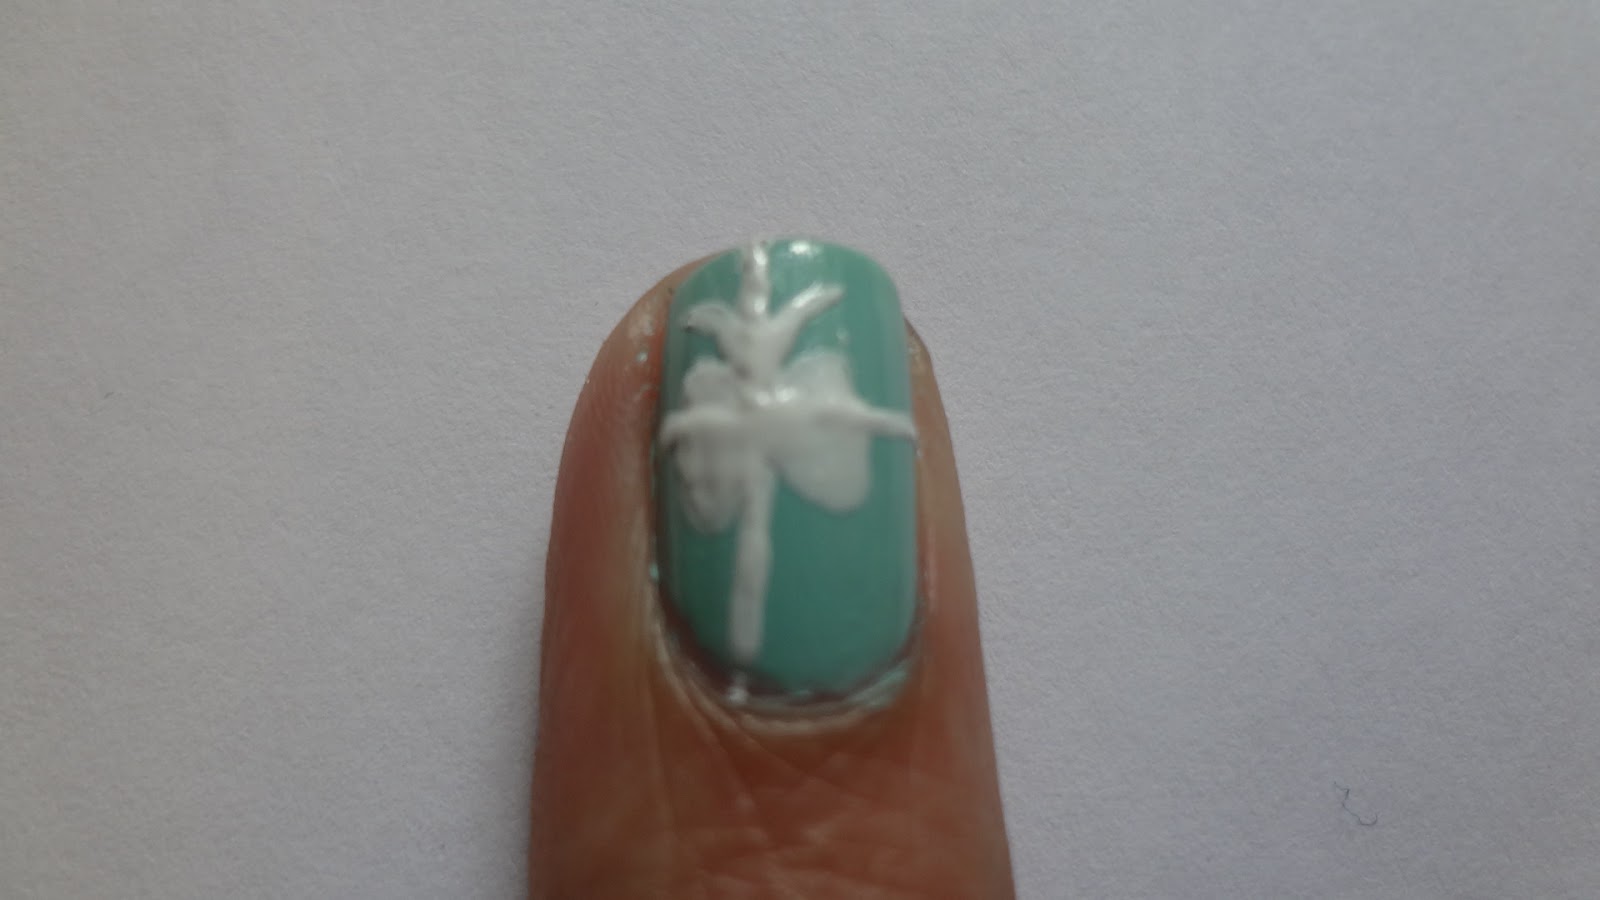
5) Next you add the bow. To do this, create a sideways '8' on one side of the horizontal line making sure the centre of the '8' aligns with the point where the two lines meet. From that point, create two curvy lines going towards the end of the nail.

6) This is the fun part! using a dotting tool or toothpick, place a dot of top coat in the centre of the of the bow. Using that same dotting tool or toothpick, pick up a gem and place on the dot.

And this is what your ring finger should look like:
7) To finish off apply a liberal amount of your favourite top coat. This part is important as it makes sure you gem is not going to budge and protects your nail design. For me the gem stayed put for 10 days with the Revlon top coat.
You may realise that I didn't end up using the Rimmel London nail polish in Disco Ball. This is because I felt that it would give too much of a sparkle but if you love glitter, make sure to add that nail polish on top of the silver polish.
I hope you do try out this nail design and enjoy it as much as I did. We have a haul coming up soon so make sure to check back!
Ace Nails
x
Love this look, its so cute!
ReplyDeleteI Wasn't sure if to purchase Mint Candy Apple, is it worth the hype?
lydia
www.lydiacurtis.blogspot.co.uk
xx
Hey thanks for checking out my blog :) and I'm actually planning to post a blog about all my mint nail polishes and which are my favourites. But yes if I was too choose a mint nail polish, I would choose the between Essie - mint candy apple and China Glaze - For audrey :) Hope that helps Lydia
ReplyDeletex
so cute! oh my! when ever I try they look horrendous. haha. I'm following you now and would love if you could have a look at my blog! :) xo
ReplyDeletehttp://blossomeclectic.blogspot.com.au/
Hey thank you! just keep trying - they will look amazing with some practice :) I have checked out your blog and you now have a new follower.
DeleteAcenails
x
Very sweet design! It reminds me of Tiffany jewellery boxes!
ReplyDeleteKeep up the blogging! :D
Yinyin xx
YinyinLoves
Thank you :) x
Deletethere are gorgeous. I wish I had the patience and skill to do designs like this on my nails. Lovely post xx
ReplyDeleteDanielle || Miss Sunshine & Sparkle